How to Create a BitMEX Account
 Looking to get started with crypto derivatives trading on a safe crypto exchange? Below is a step-by-step guide on how to create and verify your account on BitMEX to get started with crypto derivatives trading.
Let’s dive in.
If you haven’t signed up for a BitMEX account yet, we’re currently offering $5,000+ worth of trading credits to new users – you can register here.
What You’ll Need:
To ensure a smooth registration and KYC process, have the following readily available:
- Valid Photo ID: This can be your passport, national ID card, or driver’s licence.
- [Occasionally] Proof of Address: In some cases, a utility bill (electricity, water, bank statement) from your local jurisdiction may be required to verify your residential address.
Key Steps to Create Your BitMEX Account
1. Open the Registration Page
On the BitMEX homepage, locate and click the “Sign Up” button on the top right corner. This will take you to the registration screen where you will be asked to input your basic detai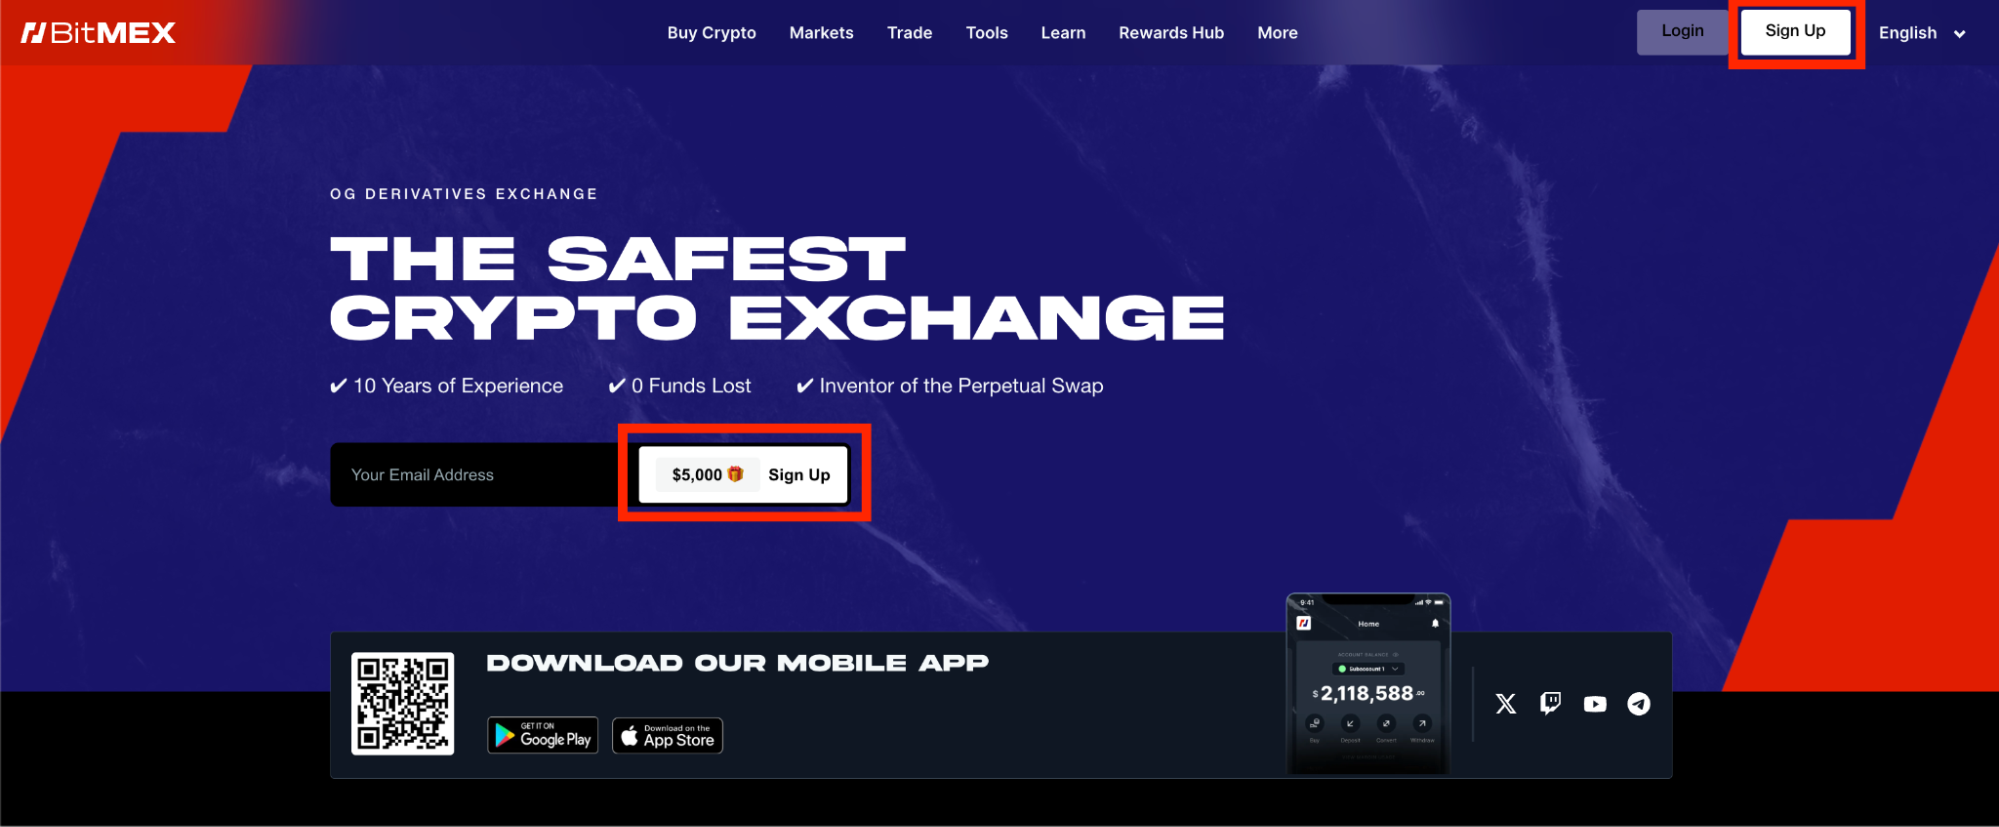
- Email Address: Enter your email.
- Password: Choose a strong, secure password.
- Invitation Code (Optional): If you received an invitation code from a BitMEX Affiliate or friend, enter it here.
- Verify You’re Human: Complete the security check to confirm that you’re not a bot.
- Terms and Conditions: Read and accept the terms and conditions and privacy notice. We highly recommend reviewing these documents to avoid any confusion.
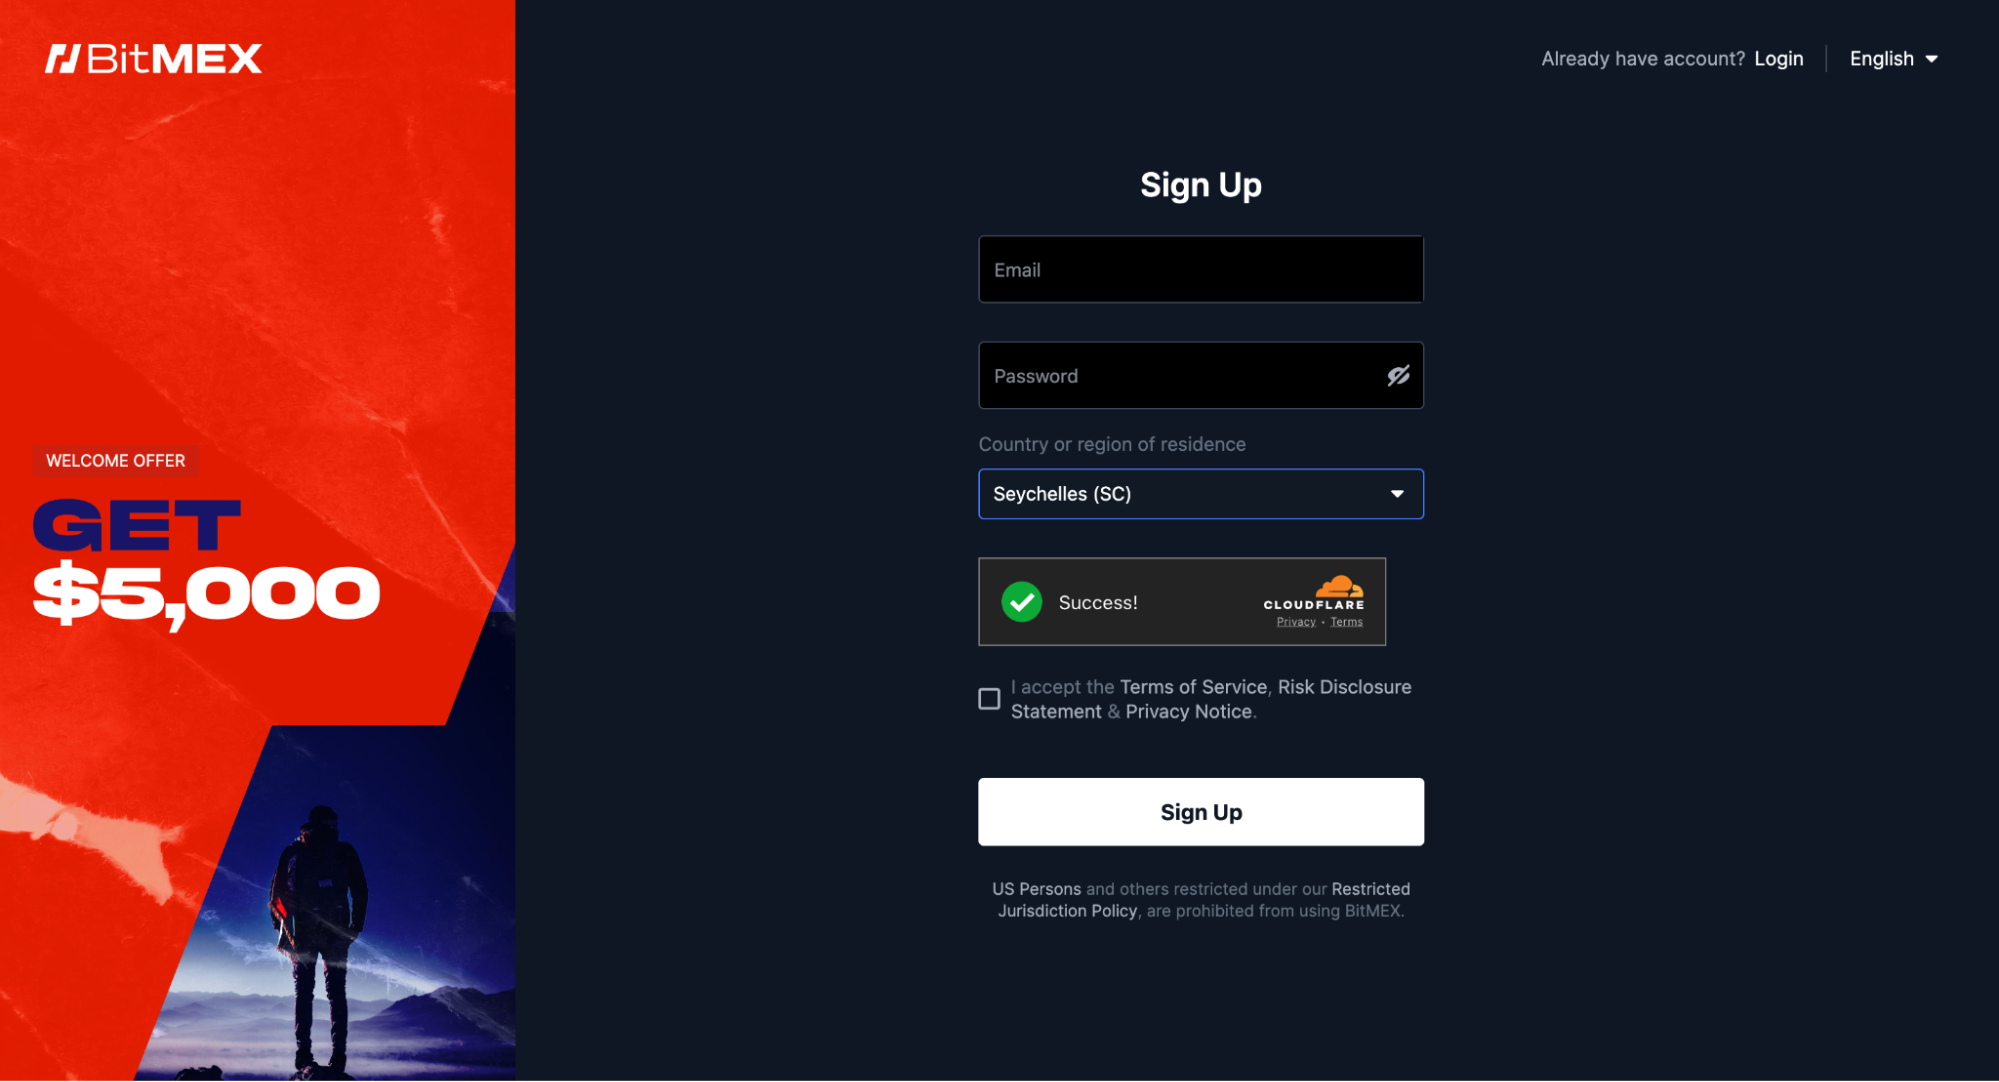 Once completed, click “Sign Up”. A confirmation email will be sent to your inbox; open it to verify your account and proceed to log in.
Note: US Persons and others restricted under our Restricted Jurisdiction Policy are prohibited from using BitMEX.
2. Set Up Your BitMEX Account
Once you log in with your account credentials, you’ll be prompted to choose between an “Individual” or “Corporate” account. For most users, “Individual” will be the correct option.
From there, you’ll be asked to specify a few items:
- Enable Browser Location: BitMEX offers the convenient option to use your browser location as proof of address. We recommend enabling your browser location to significantly speed up your account set up process.
- Welcome Offer: New users on BitMEX can receive $5,000+ in trading credits (details here).
- US Citizen/Resident Confirmation: Confirm that you are not a US citizen or resident.
3. Input Your Personal Details
Next, you’ll be asked to enter your personal information:
- Date of Birth
- Nationality
- Place of Birth (Often the same as your nationality)
4. Identity Proof: Upload Your ID
BitMEX places the maintenance of its security and integrity at the forefront of user protection. A crucial step in this process is the implementation of a strong KYC (Know Your Customer) procedure, which is designed to prevent illicit activities such as money laundering, and to protect you from engaging with individuals who may pose a risk to the exchange or our users.
A critical part of KYC on BitMEX is the gathering of user identity proof.
- Issuing Country: Select the country that issued your ID.
- Upload ID: You have two options:
- Laptop Camera: Directly take a photo of your passport’s photo page using your laptop’s camera.
- Continue on Phone: BitMEX can send an email to your phone, allowing you to open it and use your phone’s camera for a higher-quality scan.

Once your ID photo is accepted, you will be asked to proceed to the next stage.
5. Video Verification: Prove You’re Human
Next, you’ll be asked to complete a quick video verification to confirm you are a real person and the rightful owner of the ID uploaded.
- Record Video: Click “Record Video.”
- Instructions: Follow the on-screen instructions, which typically involve moving your head or speaking a phrase.
- Enable Camera: You’ll need to allow your browser to access your camera.
6. Address Proof: Verify Your Residence
If you did not enable browser location or if your location requires additional verification, you may be asked to provide a proof of address.
- Document Type: Select an easy document to upload, such as a bank statement or a recent utility bill. Ensure that it clearly shows your name and address.
7. Funding and Experience Details
The final step to complete your BitMEX account set up is to provide a few details about your funding source and trading experience. This information helps BitMEX tailor your trading experience and ensure that it aligns with regulatory requirements.
Once the above steps are completed and approved, you will receive an email notification to fund your BitMEX account. To learn more about how to deposit funds into your newly created account, read our article here.
For more information on how to get started on the BitMEX platform, visit this page.
If you haven’t signed up for a BitMEX account yet, we’re currently offering $5,000+ worth of rewards to new users – you can register here.
To be the first to know about our new listings, product launches, giveaways and more, we invite you to join one of our online communities and connect with other traders. For the absolute latest, you can also follow us on Twitter, or read our blog and site announcements.
In the meantime, if you have any questions please contact Support who are available 24/7.
The post How to Create a BitMEX Account appeared first on BitMEX Blog.
BitMEX Blog